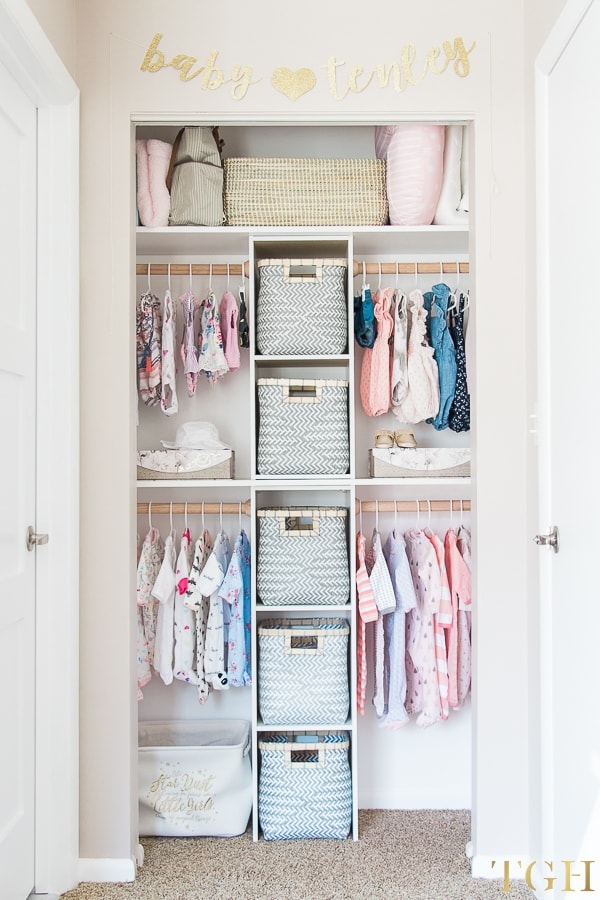
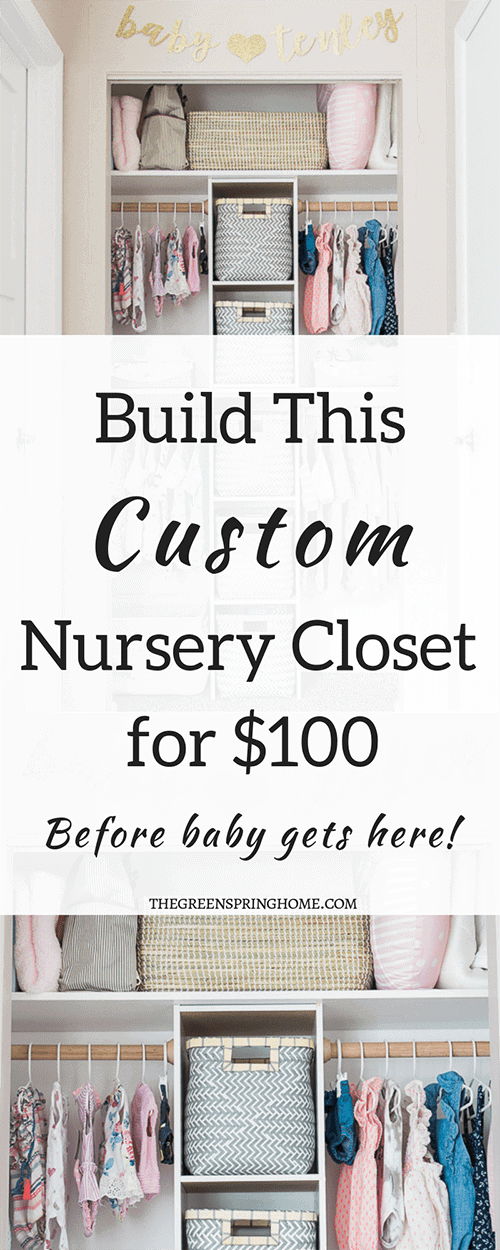
Today I am showing you how we built this custom nursery closet for $100.
Most standard closets are not functional for a nursery, and if you’re like me you want to live an organized life with modern benefits.
Maybe you’re having a baby boy OR baby girl… either way, this nursery closet system is gender neutral and will work for you.
Disclosure: Affiliate links are used in this post, at no cost to you.
Step by Step Tutorial for this Baby Closet DIY
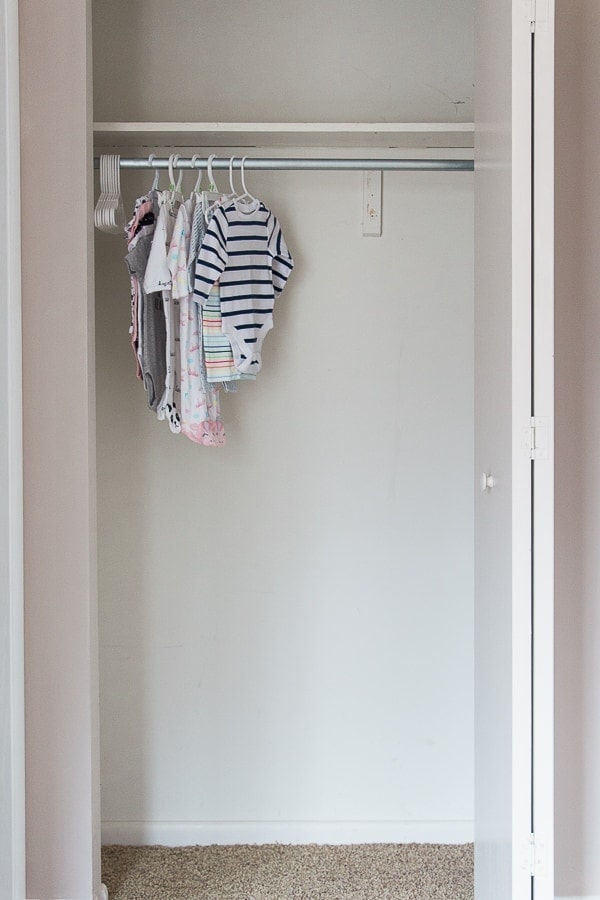
Prepping the Existing Closet
First, we removed the sliding doors and took out the single shelf and metal pole that were original to the closet.
We patched up the holes from removing the shelf and painted the entire closet with a fresh coat of white paint – Benjamin Moore Chantilly Lace.
Here’s what it looked like before!
Related: How to Design the Nursery of Your Dreams
Making Our Material List to DIY this Nursery Closet
We started off by taking measurements of the closet and making a list of the materials we needed.
For reference, this closet is 48 inches wide by 96 inches high.
Materials Used:
1 x Closetmaid Vertical Closet Organizer, 12″, White – $39.00
2 x Closetmaid Selectives 48″ White Laminate Shelf – $26.00
1 x Closetmaid Selectives 14 in. White Metal Shelf Support Kit – $8.50
1 x Everbilt 6 Ft Oak Closet Pole – $19.00 (updated in 2021, this price went up)
4 x Everbilt 1-5/16 in. Heavy-Duty Wood Closet Pole Sockets – $12.00
Project Total: $104.50
Please note: If the exact vertical closet organizer I used is out of stock, I found this very similar one.
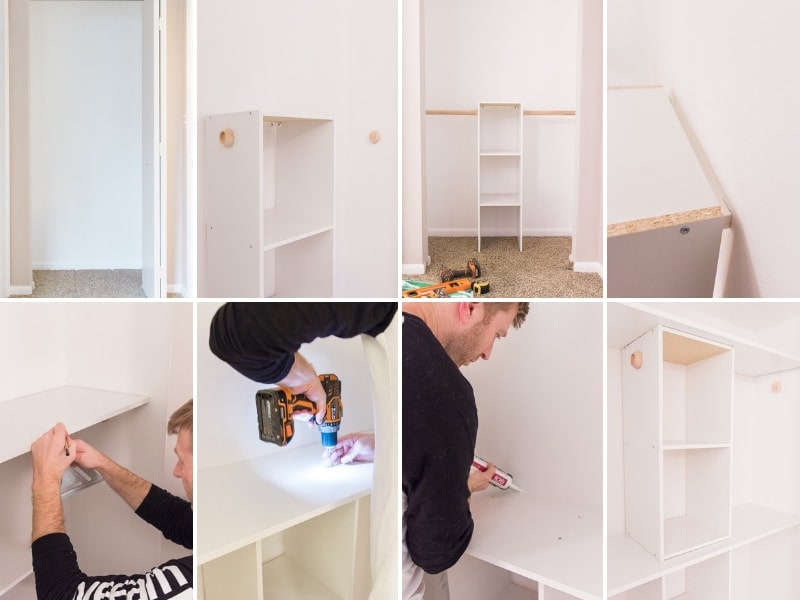
Building the Nursery Closet
We built half of the vertical closet organizer and secured it in the center of the closet.
Then we installed one of the shelves right on top of the organizer and screwed it directly into the organizer.
Next, we secured the second half of the closet organizer on top of the shelf.
Finally, we installed the second shelf on top of the entire closet organizer.
Our walls were uneven so there were small gaps between the wall and the shelf.
We used white caulk to fill in the gaps and now you don’t notice them at all.
All of the closet pole sockets went up first, ensuring each was level, then we cut the 72″ closet pole in four 18″ sections.
Customizing Our Nursery Closet
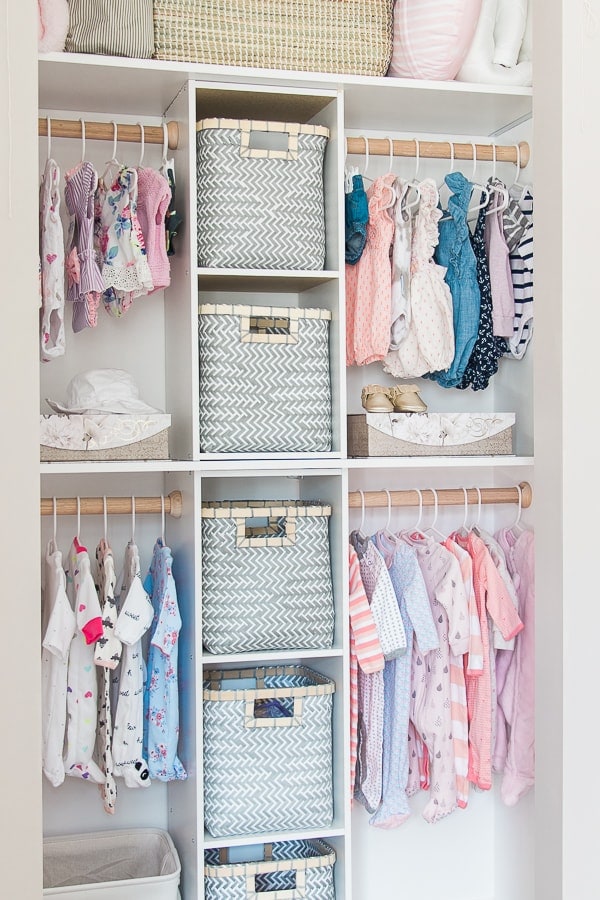
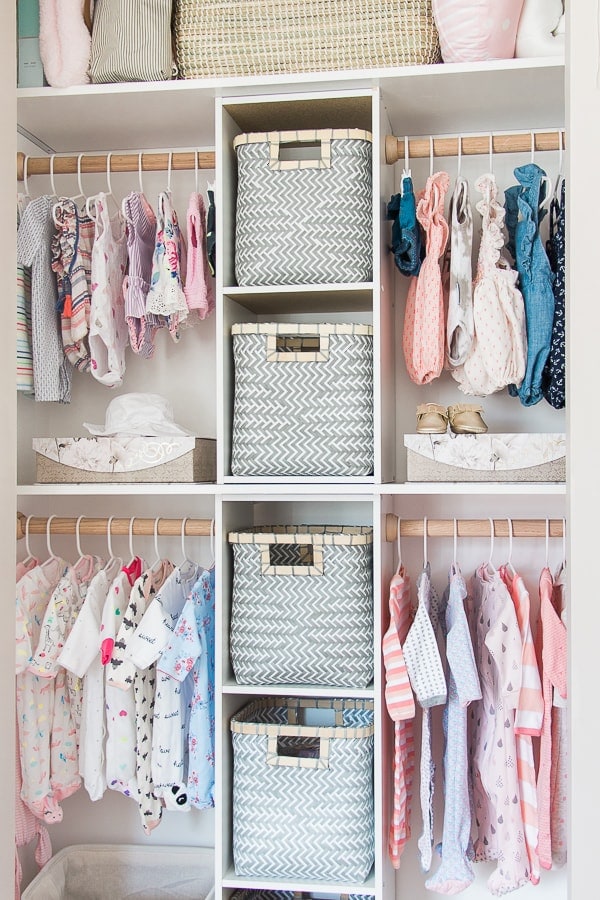
Because of the height of our closet opening, we could only use five cubes even though the system came with six.
The system also came with only three closet poles, leaving a space for long hanging.
Since our closet would be filled with children’s clothes, I wanted to maximize the space with four hanging sections.
Related: 9 Stylish & Top-Rated Nursery Dressers You’ll Love
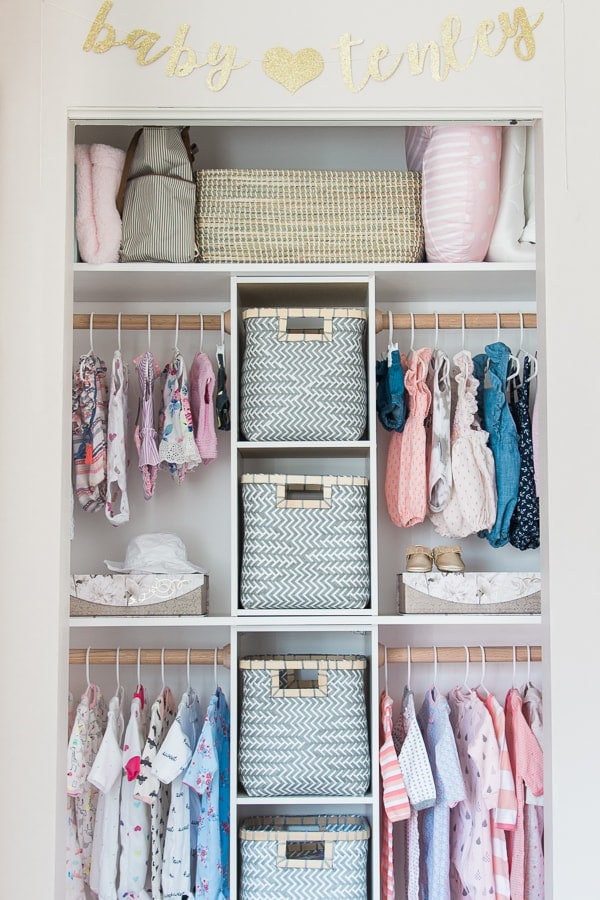
This led me to purchase these natural wood closet poles which look much fancier than the white plastic poles it came with anyway.
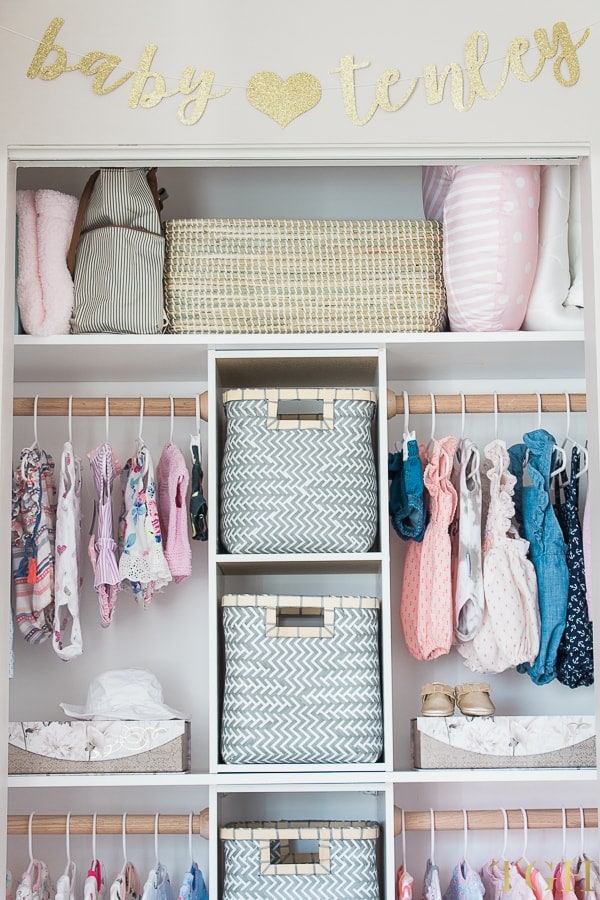
We used a metal support kit underneath the top shelf to ensure it could hold bulkier items.
Right now it’s holding her extra crib mattress cover and sheet, boppy pillow, diaper bag, blanket, and carrier.
My sister had this personalized banner made for my baby shower, and I love seeing it hung here!
Adding the Finishing Touches to our Baby’s Closet
Each cube fits a standard 11″ x 11″ x 11″ bin or smaller.
I chose these neutral, woven baskets because they were made of durable polypropylene.
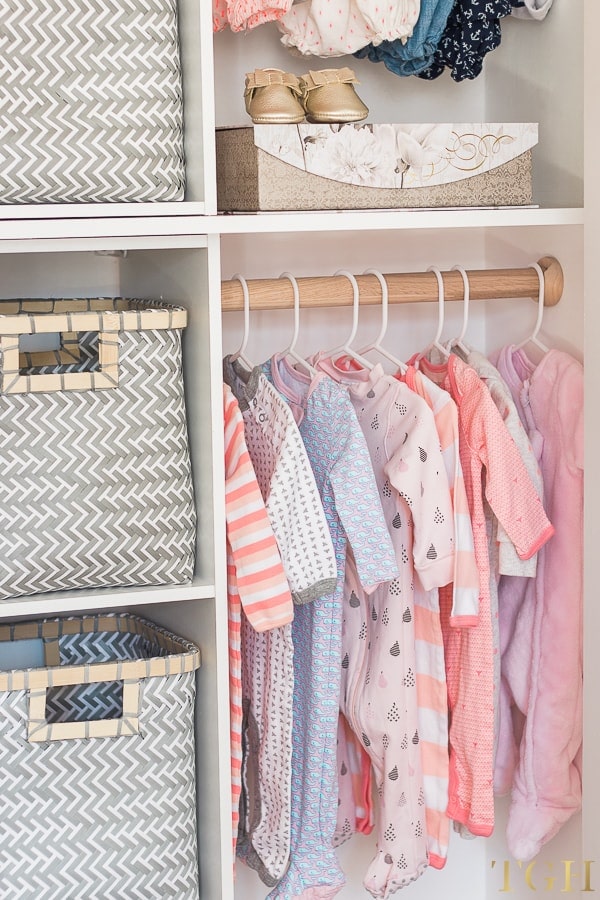
While I would have loved some dressier hangers, I wanted to keep costs low so these white baby hangers work perfectly.
Related: The Best Nursery Gliders for Mom & Baby
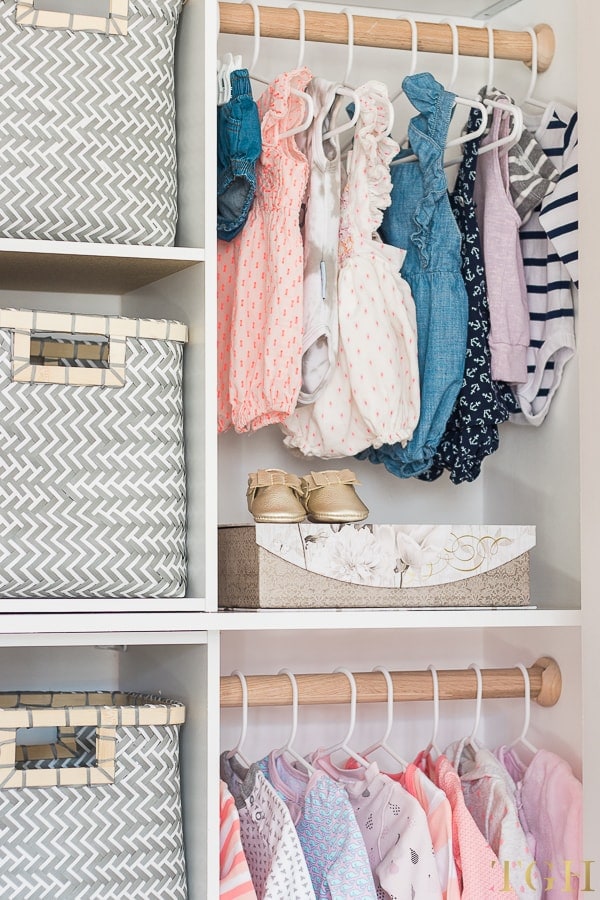
The floral boxes are from Home Goods – one holds her bows & headbands and the other holds her socks, booties, and other winter baby accessories.
Some of my favorite accessories are displayed out in the open, and I’ll probably rotate these as I find new favorites.
What’s cuter than baby moccasins and a sun hat?
Here is the “After” shot again. I’m really happy with how it turned out, especially considering the price.
I LOVE seeing her pretty little outfits all neatly displayed.
Related: Dress Up Your Nursery With This Easy DIY Fabric Garland
Need More Inspiration on Closets for Babies?
You’ll love these 10 unique baby closet ideas! Some of them you won’t have to install a thing, which means no handy skills required.
Building a Custom Baby’s Closet – Frequently Asked Questions
What do you put in a nursery closet?
As a general rule, hang your dressiest outfits in the closet such as dresses, rompers, dress shirts, dress pants, cardigans, etc. Personally, I hang my best looking one piece sleepers in there as well which I use daily.
You don’t want your closet to look bare, but you also don’t want it bursting at the seams. Display your most favorite articles of clothing and once filled, store the rest hidden in your dresser. We have some great tips on how to organize your nursery dresser if you scroll to the bottom of the post.
While I keep blankets, sleep sacks, onesies etc in the dresser, use your closet baskets (or drawers) for shoes, socks, headbands, hats, and a system for baby clothing as it becomes too small. If you do not have space for a dresser, you’ll want to use standalone drawer organizers to maximize the floor space of the closet as well.
The top shelf of the closet can serve as a catch all for large items such as an extra crib mattress cover, extra boppy pillow, diaper bag, baby books, blankets you’re not using yet, baby carrier, etc.
Do babies need hanging space?
Need and want are two different things, but I think so! You’ll love seeing all of your baby’s special outfits on display. It’s more time consuming to hang clothing items versus rolling them up and putting them in a drawer. However, you’ll enjoy seeing them every time you open the closet and seeing them will help you quickly pick out outfits.
Can you use a walk in closet as a nursery?
Sure, why not! You’ll just have to get creative with how much space the room has. Depending on how small it is, you may not be able to fit all of your nursery furniture in there, like the glider, crib, and changing table.
We’ve actually got a great post on 12 creative small space nursery ideas.
Also, ask yourself… does it have a window, ceiling fan, and/or electrical outlet? You’re going to spend a lot of time in your baby’s nursery, so you may not be as comfortable without those things. However, if it’s your only option, you make due with the space you have!
Related Baby Nursery Posts
25+ Dreamy Nursery Wall Decoration Ideas
20 Ways to Decorate Baby’s Room Without Painting
The Best Nursery Paint Colors by Benjamin Moore
9 Affordable Cribs that Won’t Break the Budget
25 Pretty Playroom Storage Ideas to Stay Clutter Free
A Detailed Review of the Newton Baby Mattress
PIN THIS NURSERY
Did you only use the support shelf kit on either side of the top shelf? Nothing in the middle right? If I wanted to support the bottom I would need 2 packs of the kit?
Also, did you screw the shelf into the wall or how did it stay up without collapsing?
Hi Cristina, so sorry for the delay! Things have been crazy around here. We’re pregnant again, so actually, I’m designing another bedroom for Tenley (and closet too!).
Anyway, we only used one shelf support kit, and we put it underneath the top shelf. I knew I’d be storing larger/heavier items up there so it needed to be very secure. We chose not to use a shelf support kit on the middle shelf, only because my husband said that screwing the shelf into the top of the cube underneath it was enough to support. We knew we weren’t storing anything heavy on that shelf. A shelf support kit is only $8.50 so you might as well put one under the middle shelf too so you never have to worry about it being secure. You can also screw it into the cube below for extra strength.
Hope that helps! Thanks for following along 🙂 – Kelly
Hello,
I am wondering if you guys did anything to “secure” the cube shelves to the floor or wall, or are they just free standing? Love the closet and trying it out for our first baby room!
Hi Rachel, we did not need to secure the cubes to the wall, mostly due to the trim at the bottom of the wall, it didn’t sit 100% flush because of the trim. We did however secure the shelf to the wall with the shelf brackets, and then we screwed both shelves into the top of the cube below it. We also caulked the shelf to the wall as a finishing touch. Hope that helps! Soo exciting, let me know over on Instagram how it turned out 🙂 – Kelly
I have been looking for baskets exactly like this or similar for our closet. The link provided says no longer available. Can you recommend similar ones or another link. This closet is beautiful !!
Hi Joleesa! Sorry for the delay 🙂 Such a bummer the baskets I used are now sold out. As long as you find something that’s less than 11″ width/height/depth it should work. How about either of these? https://rstyle.me/~ajoLQ or https://rstyle.me/+XJtznDNP2wMEciFXTdN08w ? The Container Store can be pricey but they always have sales or you can get 15% off for email signup. XO, Kelly
What was the dimensions of your door opening? Our closet is 48″ wide as well and I’m struggling to find something to organize it as my opening is just a standard interior door.
Hi Leslie! Our closet door opening is 36″ x 80″. I agree the smaller opening makes it even tougher! That’s why we chose to only use 5 out of the 6 cube cubbies the closet system came with, because otherwise the 6th cubby would’ve been completely hidden behind the opening. Overall though I think we maximized every inch of space in there 🙂 XO, Kelly
Hi there! Did you cut the particle board to take out one of the cubbies? The shelving unit is an 1/8in too tall to fit under the existing horizontal shelf I have in my closet so trying to figure out the best way to cut it down.
Is it possible to only build this halfway up, just because the photo in the Walmart link looks like it’s one big piece?
Hi Kamryn, yes it is possible! Even though the Walmart photo is of it set up as all one piece, when it comes it’s actually all in pieces that need to be put together. So you get to choose how many cubes you ultimately want to build together! Hope this helps 🙂 XO, Kelly
Hi! I was wondering how you only used the 5 cubes instead of the 6 it comes with. My husband and I are running into the same problem where using the 6th cube leaves no room for the upper shelf. How did you reduce the top portion from 3 to 2 cubes if the side panels are one length? Did you have the side panels cut? Thank you!
Hi Laura, we cut the side panels with a circular saw we borrowed. If you don’t have one, if you measure beforehand, Home Depot will usually make the cut for you in-store. Hope that helps! 🙂 XO, Kelly
Hi, at what heights did you place the closet rods?
Thank you!
This is the exact size of our nursery closet, THANK YOU SO MUCH FOR SHARING THIS!! It is impossible to find this style of closet as a premise set, certainly nothing under $300-400! You are a total lifesaver, thank you so much. Our baby is due in 3 weeks and we will be starting this project TOMORROW!! Thank you again!
Hi Sarah, sorry for the delay. Yay! I’m so glad it helped you. Hope your baby girl arrived safely and the closet turned out nicely 🙂 Tag me on Instagram if you end up sharing a pic of it. XO, Kelly
Hi there…. I actually clicked on your picture of a kitchen counter and cabinets with glass grey-is backsplash and pink flower arrangement. And it brought me to this baby closet makeover. Super cute….. but I would like info about the backsplash tile- 🙂 hahaha
Hi Kristin, woops! I don’t blame you LOL. Sorry for the link confusion. Here’s the link to our kitchen backsplash, it’s available on Wayfair: https://rstyle.me/+pPYDOFry2BbVfKBCWvI-0Q
XO, Kelly
Hi, what was the paint color you used for her actual room? I love the very light blush color!
Hi Stacey! It’s Sherwin Williams Big Bend Beige actually 🙂
Hello I absolutely love this I’m building one next week for my son where can I find the links are purchased everything to build this I really appreciate it thank you so much
Do you use any certain screws to attach the rods to the shelf or just something short enough so it didn’t poke through
Hello! Great design and instructions. I have one question… what is height of your door opening? I’m trying to plan if I can use the full size – 6 cubes or if I have to reduce to 5. Thank you!