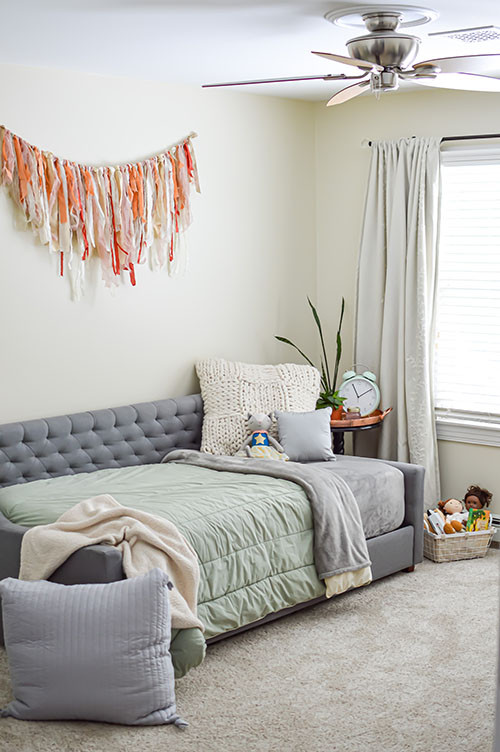
Looking for a fun and easy way to add some personality to your child’s room?
You’re going to love this post on how to make a DIY fabric garland in four easy steps! This project is perfect for anyone on a budget who wants to add a little bit of color and life to their space.
All you need is some fabric, ribbon, and scissors – so it’s easy enough that anyone can do it. It doesn’t require any special skills or tools.
You can use any type of fabric you want – from cotton to silk – so you can create a fabric garland that perfectly matches your style.
Now, let’s get started on making this super cute fabric garland!
How to Make a Fabric Garland
It’s time to give you the instructions on how to make your own DIY fabric garland.
First things first, I’m sure you are wondering… how long will this take me?
The hands on time for this DIY project is about 2 hours.
There are three different ways to approach this project:
- You can make a starter cut of fabric about 1.5 inches wide and then rip with the weave of the fabric to create long ribbon-like pieces.
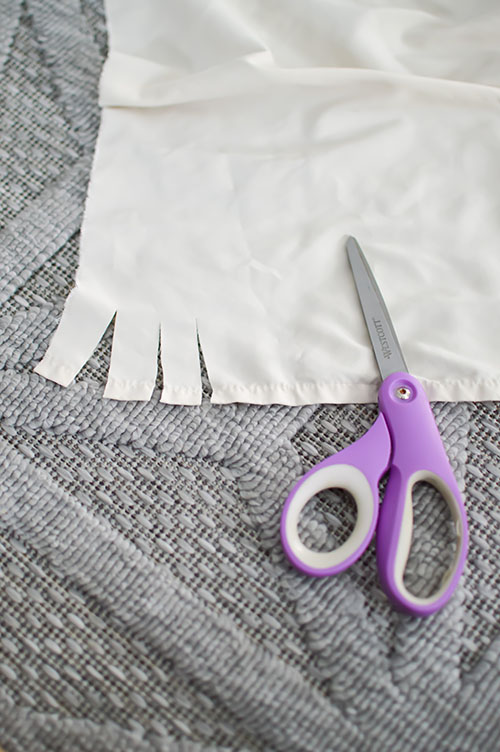
- You can cut all of the pieces of fabric which will yield cleaner lines and less mess to clean up from torn fabric fibers.
- You can actually use ribbon instead of fabric, which is by far the fastest option but also the most costly.
If you prefer option # 2, a rotary cutter and cutting mat would make quick work of this!
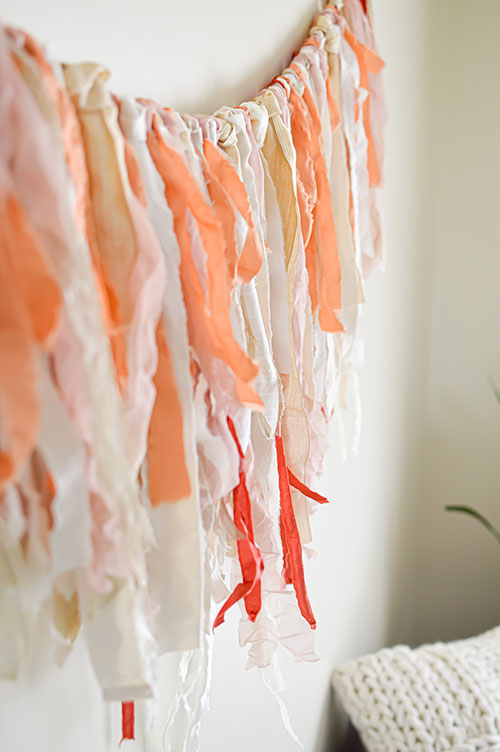
However, this DIY tutorial uses a combination of options # 1 & 3. I simply adore the softness of the torn edges and then added just a bit of golden ribbon.
Related: 10 Gorgeous Pink Nursery Ideas You’ll Love
Planning Out Your DIY Ribbon Garland
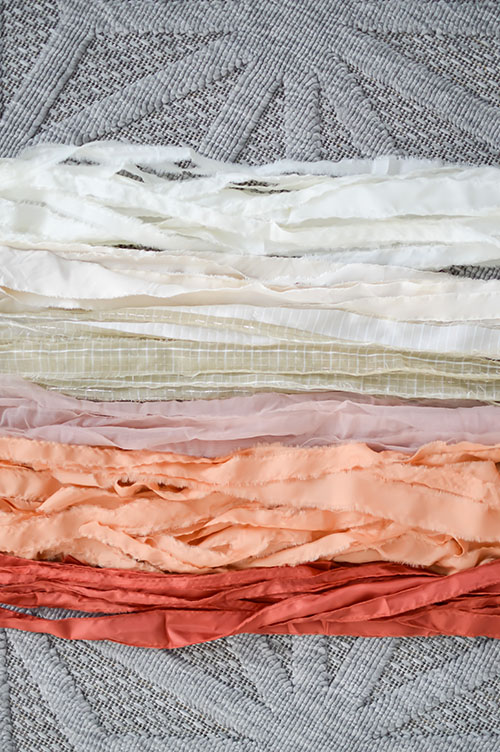
Start by decide how many colors and textures you want to see in your fabric garland.
Do you want the colors even split or others to be more pre-dominant?
Try using one fabric that has a soft pattern to it to help create a bit more depth!
FYI: Synthetic fabrics work well for this project if you will be ripping them. Thick fabrics such as velvet will need to be cut.
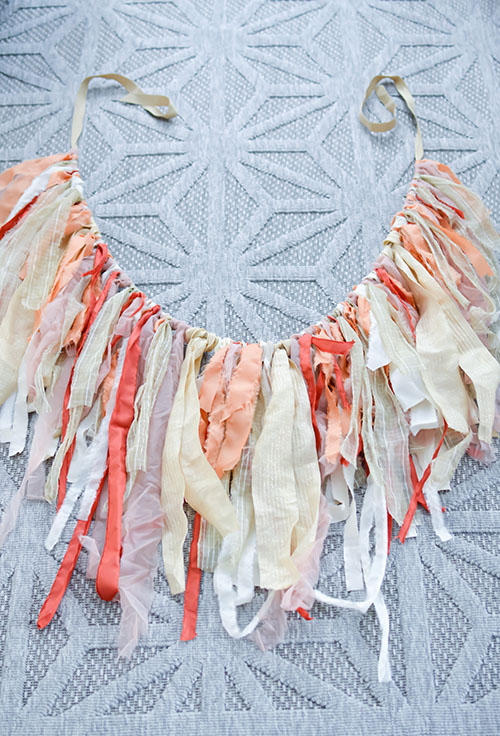
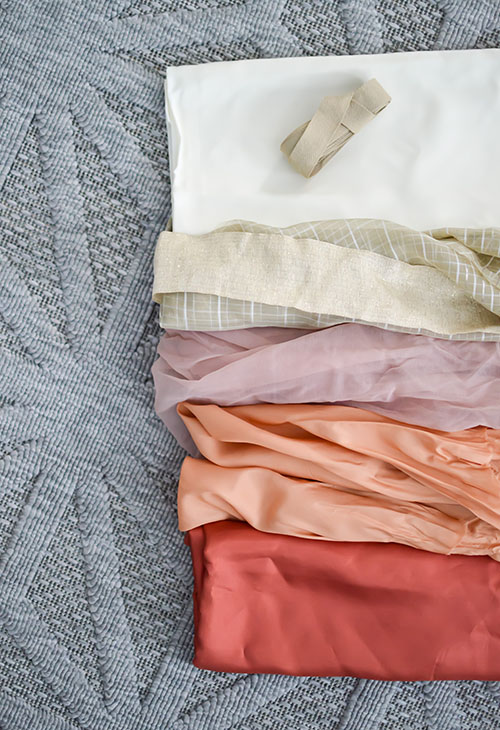
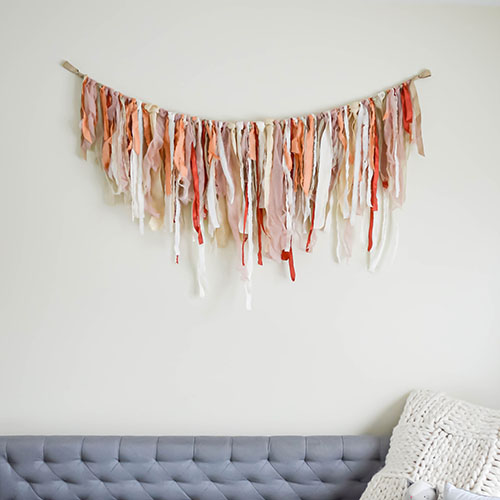
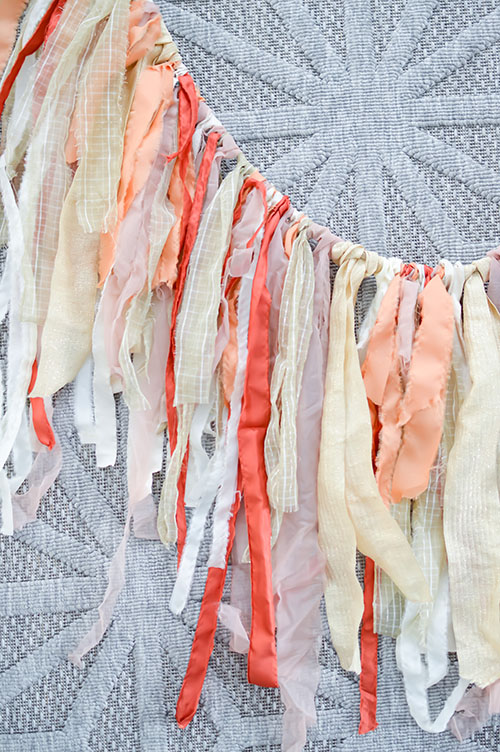
In our DIY fabric garland pictured below, there are 6 different fabrics plus 4 pieces of a wide gold ribbon.
There are about 150 pieces of the fabric ribbon pieces. The average width of each fabric ribbon is about 1.25 inches and average length is about 24 inches.
You can choose to make the garland as wide as you would like. In my example, the decorated garland section is about 6 feet wide.
You may also make the individual ribbon pieces as long or short as you like. Adjustments you make will alter how much total fabric you need for this project.
How much fabric will you need for this project? Aim for about 3 to 4 yards total in fabric.
You’ll also need 1 long main piece of fabric or ribbon to hang all the pieces from. The ribbon used in this project was about 9 feet long total.
Setting Up Your Fabric Tassel Garland
First, gather up the materials you’ll need for this DIY project.
You only need 3 things!
- Fabrics and/or ribbons
- Scissors
- Tacks to hang the garland from
Next, plan out how and where you will hang the main piece of ribbon that you will tie all of the ribbons to.
Think tightrope, avoid making permanent knots that will have to be cut, but the sturdier the main ribbon is, the faster this will go.
You can use two chairs that you tie each end of the ribbon to, two door knobs, we used the bottom of our stairs, get creative, it will help this part of the project go really quickly!
It only took about 20 minutes to add all of the fabric ribbons onto the main ribbon.
I’ll be honest, this project can make a little bit of a mess. Nothing a quick vacuum clean up can’t handle, but you may want to choose to do this away from curious pets or little ones.

Step by Step Tutorial for This DIY Fabric Garland
Step # 1: Start to Cut or Rip the Fabric Pieces
Now that you’ve selected and set up your fabrics, you can start to cut and or rip the pieces.
We did a mix of random sizes from ½ inch wide up to about 2.5 inches wide.
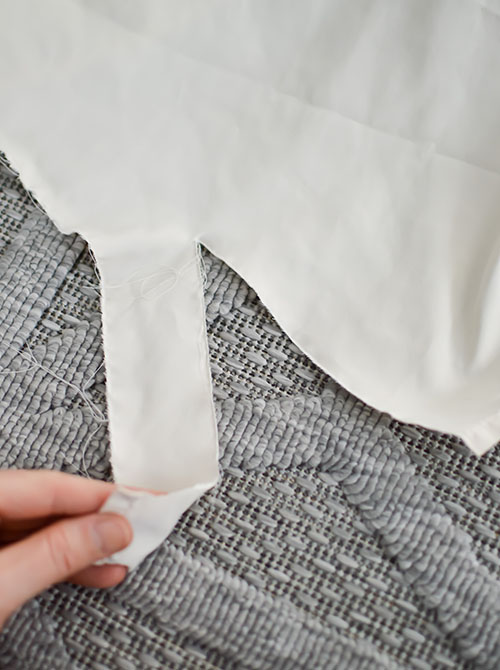
Leave the fabric pieces whatever length they are until you are ready to add them into the garland and have a better idea for the ideal length. For most pieces I simply cut them in half before hanging.
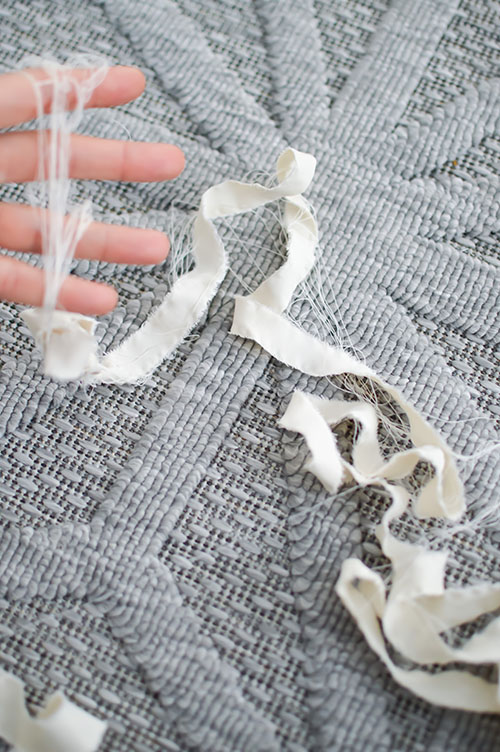
If you are ripping them, cut all of the pieces per color and take the time to gather all of the loose strings and set aside.
This is honestly the longest part of this project, but well worth it! Skipping this step if ripping the fabric will likely result in tangled frustration.
Removing them as you go will help all future steps go smoothing and quickly!
Finally, cut the accent ribbon pieces if you are using any – in this example my gold ones.
Step # 2: Separate the colors out and put them in the color set you desire
I like to separate the colors and add them all in color sets, you can add a mix at the same time if that helps you though.
Step # 3: Secure your main ribbon to its temporary hanging spot
Once all of the fabric pieces that will be hanging are cut, secure your main hanging piece of ribbon to its temporary spot, like your stair banisters as discussed above. You can then start to loop tie the ribbons on!
Step # 4: Start tying your cut fabric pieces onto the long, hanging strand of ribbon
You’ll find these images of each step helpful to follow.
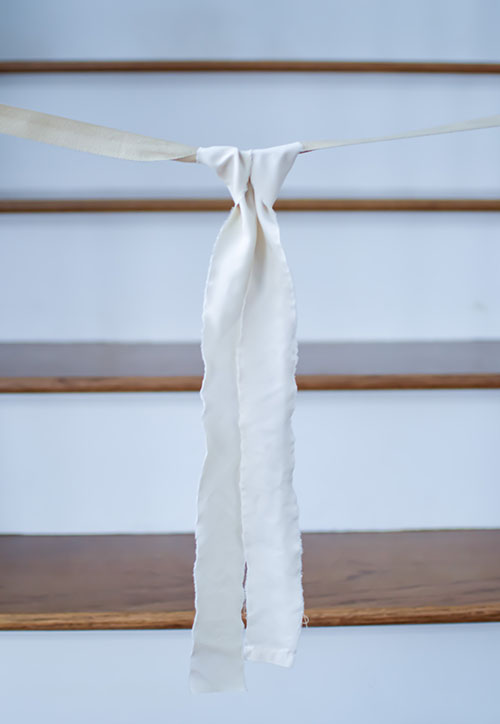
The type of knot here is called a Lark’s Head, in case you would like to do a quick search on it.
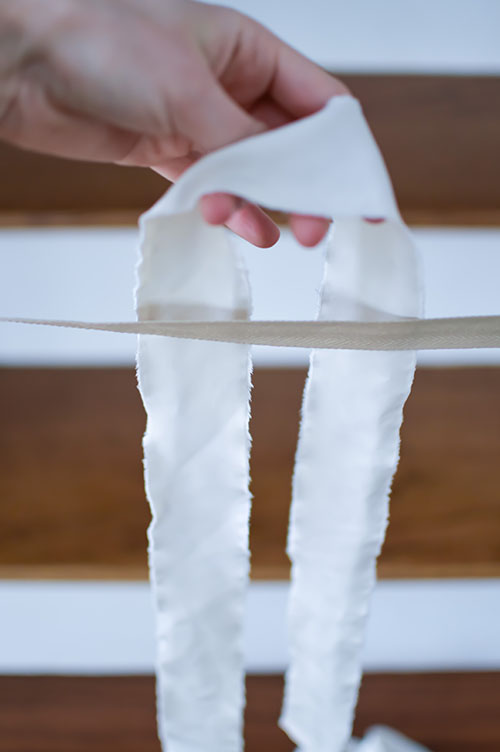
Pick up the first piece of fabric ribbon in roughly the middle and hold it behind the main horizontal ribbon.
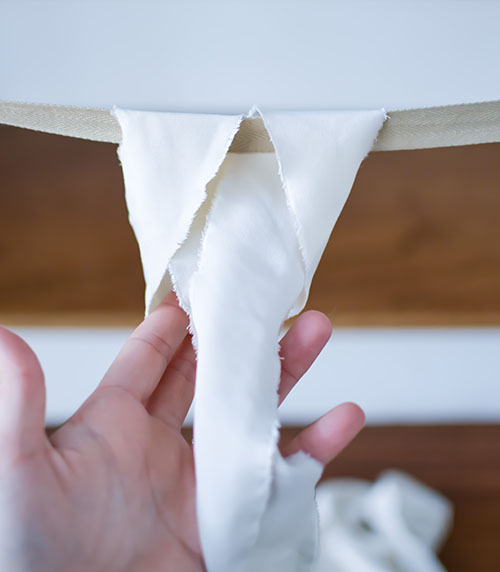
Take the ends of the fabric ribbon and feed them up and through the same looped fabric ribbon piece so that it makes a loose knot around the horizontal main ribbon.
You can decide how loose or tight you would like the loop/tie/knot to be.
Repeat these steps until you have added all of the fabric ribbon pieces and ribbons.
I added them one color at a time and filled in the gaps of colors as needed.
Remove any additional loose strings if you come across them while doing these steps.
Once all of the ribbon pieces are added, you can decide if it is as full as you would like it to be. More ribbon pieces can always be added to it!
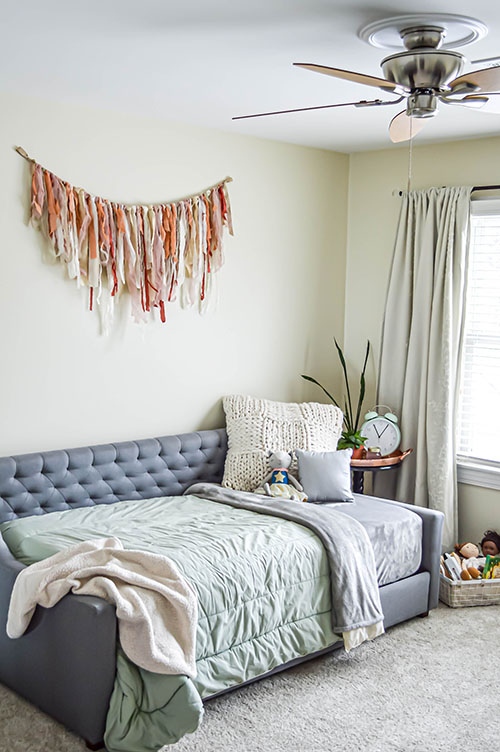
Simply leave enough room on the ends of the main ribbon to hang the garland on the wall with your tacks.
I made a quick basic knot with a loop on each end of the main ribbon to hang the garland from.
Ribbon Garland DIY: The Finished Product
Frequently Asked Questions about Nursery Fabric Garlands
Where should I buy my fabric?
The two most popular places to buy fabric are Joann Fabrics and Michael’s. You’ll find a great selection at fairly low prices at both of these stores. Don’t forget to go on their website and save any current promotional coupons to save!
How much fabric do I need?
The exact amount of fabric you’ll need will depend on how wide and how long each strand is. For planning and budgeting purposes, aim for about 3 to 4 yards total in fabric.
Looking for More Kids Room DIY Projects?
Next, check out these incredible kids room DIY projects being shared by my friends from Instagram. Click the links below the images to visit their posts and see more!
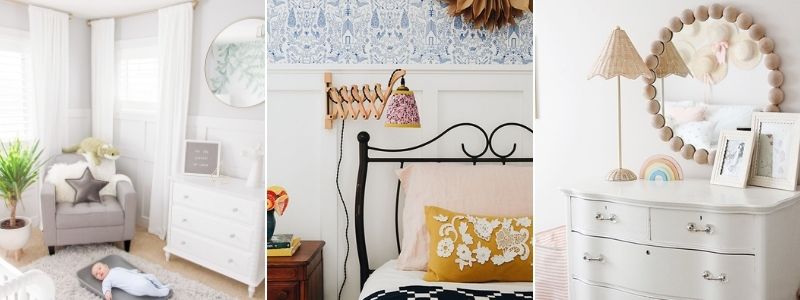
DIY Wood Ball Mirror / Courtney M. Browning
DIY Scissor Arm Wall Lamp – Francoise et Moi
DIY Peel & Stick Wallpaper – Chandeliers & Champagne
Need More Nursery & Kids Room Inspiration?
We know you’ll love these DIY related posts below!
Baby Closet DIY: How to Build This Pretty Closet for Their Room
Build This Custom Nursery Closet for $100
IKEA Kallax Toy Storage Hack DIY
PIN THIS
I’m amazed, I must say.
I am extremely impressed with your writing skills and also with the layout on your weblog.
Is this a paid theme or did you modify it yourself?
Either way keep up the nice quality writing, it is rare to see a great blog like this one these days.
Good day!
What’s up to every body, it’s my first visit of this webpage;
This blog consists of remarkable and really fine stuff in support of readers.
Its such as you read my thoughts! You appear to know so much
about this, like you wrote the ebook in it or something.
I feel that you just can do with soome percent to pressure thhe
message house a bit, but instead of that, this is great blog.
An excellent read.
I’ll certainly be back.
Sweet blog! I found it while searching on Yahoo News.
This is a really well written article.
I’ll be sure to bookmark it and
return to read more of your useful info.
Thanks for the post.
I’ll definitely return.
Great beat !
Undeniably believe that which you stated.
Your favorite reason seemed to be on the net the simplest thing to be aware of.
Your website is very useful.
Thanks for sharing!
My web site: industrialagency
Sweet blog! I found it while searching on Yahoo News.
I’m not sure where you are getting your information, but great topic.
I needs to spend some time learning more or understanding more.
Thanks for magnificent information I was looking for this information for my mission.
Cheers~~~
Visa my web site : milanmania
great content
20รับ100 pgล่าสุด การฝากถอนในเกมสล็อต PG SLOT เป็นกระบวนการที่ง่ายสะดวกสบายทำให้ผู้เล่นสามารถเข้ามาเล่นเกมได้โดยไม่มีความยุ่งยากมากมาย นี้คือขั้นตอนที่ทำให้การฝากถอนใน PG Slot
Femometer ring is a wearable smart ring for women provides 24/7 health monitoring.
goooooooood
gooooooooood
very good
fac–segc.
Oi, eu estava tentando juntar dinheiro pra comprar um notebook gamer, mas cada tentativa de economizar dava errado. Depois de algumas perdas, resolvi arriscar em https://spinmacho.com.pt . No jogo “Gates of Olympus”, acertei uma sequência incrível e fiquei sem acreditar! Para jogadores de Português, há bônus especiais que realmente ajudam. Agora tô quase com o valor total e com vontade de continuar testando a sorte.
Thank You
Недавно листал телеграм-канал про развлечения в Кыргызстане и наткнулся на обсуждение plinko game . Ради интереса зашёл, думал просто глянуть интерфейс, а в середине страницы заметил plinko, о котором все и говорили. Решил попробовать пару раундов — выпадения шли хаотично, но как раз это и затягивало. В какой-то момент даже отбил мелкие потери и вышел в плюс. Неплохой способ переключиться после рабочего дня, когда не хочется ничего сложного.
I am a student at the Faculty of Mathematics and Computer Science, University of M’sila.
Graduate of the Faculty of Mathematics and Computer Science.
Graduate of the Faculty of Mathematics and Computer Science.
That fabric garland idea is such a nice way to use up scraps and add something handmade to your space. I’ve noticed once you get into projects like that, it’s hard not to want to try other crafts too. I went from simple decor pieces straight into yarn projects, and a good crochet starter kit made it way less intimidating to begin. If you’re thinking of branching out a bit, you can check one out crochet starter kit and see if it clicks for you.
I love creative DIY projects like this because they make it easy to personalize a space without spending a lot of money. The fact that the fabric garland can be customized with different colors and materials makes it even more fun and unique. I also like that it’s simple enough for beginners while still allowing plenty of creativity. Projects like this remind me of EaglerCraft Game, where I enjoy decorating and designing spaces to reflect my own style and imagination.